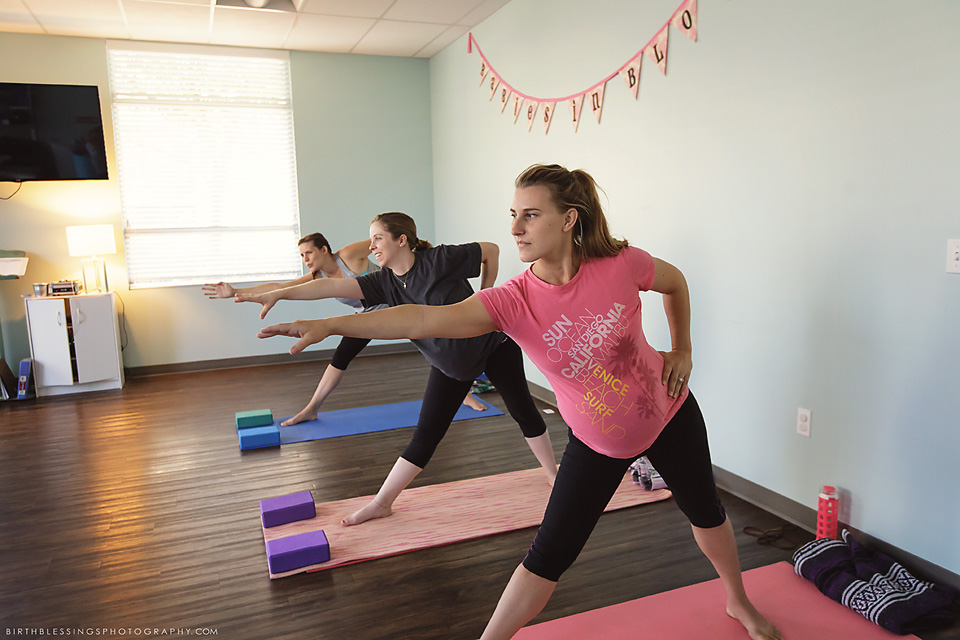
The definitions of Triangle include anything that is three-cornered. It can have three sides and three angles. So let’s look at getting the most out of this yoga pose called Triangle, aka “Trikonasana.”
 How far apart should your feet be in Trikonasana?
- Stand facing a side of your yoga mat. Place your feet either 3 ½ – 4 feet apart. Or you can extend your arms out to the side. Your ankles should be right below your wrists. When I say that in a yoga class, I look around and inevitable a few people are widening their feet quite a bit more.
- Begin by making sure your toes are parallel to each other.
- Always keep a teeny tiny bend in both knees. This ensures you are using your muscles to support your weight and not collapsing into the ligaments and tendons of your joints, or hyperextending your joints. Imagine your leg muscles flexing and wrapping around the bones of your legs. This creates a good foundation for this yoga pose.
Getting Into The Pose From A Strong Foundation
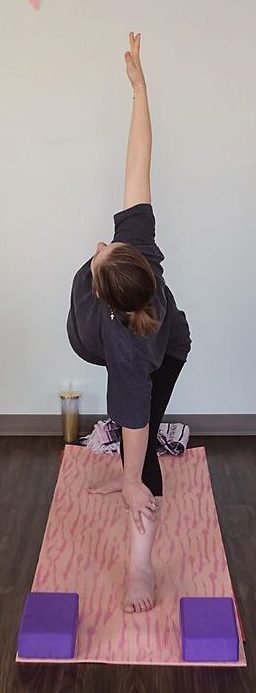
- Pivot your right foot toward one end of your yoga mat. Now your front (right) heel should be directly opposite the arch of your back (left) foot.
- If your balance is challenged, turn your back toes in and your back heel out first to see if that helps. It usually does the trick.
- If your balance is still wobbly, step your back foot closer to the front foot and inch or two. Sometimes the feet are too wide apart if you’re a bit wobbly in this pose.
Now Create Your Own Triangle
- Extend your arms out, perpendicular to your body.
- Take a deep inhale as you create as much length in your upper body as you’re able to.
- Exhale and reach as far forward as you’re able bending from the right side of your waist.
- Place your right hand on your shin just below the kneecap.
- As you reach your left hand to the sky, reach even through the tips of the fingers. Even your fingers are active in this pose.
Rotation is Key – Triangle Is A Twist
- Take a deep inhale, as you exhale slowly rotate the top of your rib cage back and the bottom of your rib cage forward.
- Pull in your belly, lift and contract the pelvic floor, firm through the legs.
Go A Little Deeper
- Slide your right hand down your shin toward your foot AS LONG AS YOU CAN KEEP BOTH SHOULDERS IN LINE WITH OR RIGHT ABOVE YOUR FRONT LEG.
- Or place a block outside of your shin, touching the outside of your shin and gently rest your right hand on the block.
- You can test yourself to feel the difference of placing too much weight in your hand. Lift your hand even just an inch to float in the air. Feel how this causes your whole body to work a bit harder and not rely on the hand for support. That’s the goal.
Your Head Should Extend Straight And Tall Just Like It Does In Tadasana
- You can stay here or if it feels comfortable on your neck turn and look up at your left thumb.
- To relieve the neck first look down, tuck your chin to your chest, then, from there, look straight up at your thumb again.
Some Yoga Teachers Will Give You Some Additional Instructions- Listen To Them And Your Own Body
- Open the top hip, or rotate the top hip back. This can sometimes aggravate the front knee. If it does, don’t force it.
- Externally rotate the front thigh and internally rotate the back thigh. Again if this irritates the knees joint, just firm up through the thighs to stabilize your pose.
Remember that, if you take classes from different yoga teachers (which is always a good idea), you may experience many different styles, many different instructions, but ultimately you will need to turn inward and find your own body’s guide to find what is best for you in every yoga pose…Remember to repeat on the other side.